So many cute holiday signs out there this year. I saw so many different versions, I couldn’t decide which one to buy. Finally, I saw one that I liked, it was on the Instagram account of a local boutique that I follow. The problem, the actual boutique is not very close to where I live and the thought of making the trip, in recent weeks, just didn’t seem that fun. Why is it that I’m so willing to drive anywhere and everywhere in the summer but not in the winter? It’s gotta be the weather. I am NOT a cold weather fan. Thus why I always suggest going to the beach for our family vacations. I was vetoed on that this year, by the way. Spending a week in the snow…not sure how I feel about that…can’t win ’em all I guess. Anyway, I was putting off the trip to the boutique until finally I decided to just make a sign myself since I had most of the things I needed. I already had the wood and paint in the garage, so one quick trip to Michaels for the metal and wood letters, and I was in business.

I started with a 1×10 piece of scrap wood that I had in the garage and I cut it to 37″ long with a jigsaw. The trim I cut out of wood lath, I had a bundle of it from a previous project so I decided to put it to use, but you could use a 1x2x8 board and that should be enough for your whole sign if it is 37″ long. I liked the lath because it has a really rough texture so it gave the frame more of a rustic look. I painted the 1×10 board with white chalk paint and stained the frame pieces with Minwax Dark Walnut. Once both were dry, I attached the frame pieces with wood glue, a nail gun and 1 1/4″ brad nails.

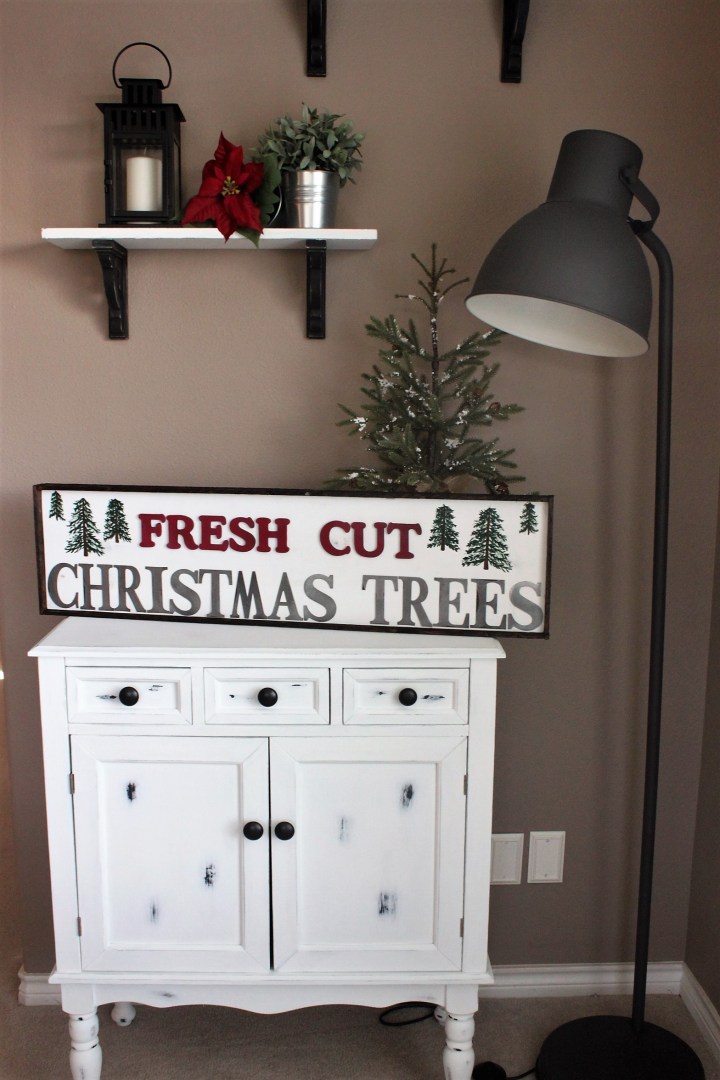
For the letters, I picked up these 2.5″ wood letters by ArtMinds at Michaels for “FRESH CUT” (spray painted with a red matte paint) and these 3.5″ galvanized letters by ArtMinds for “CHRISTMAS TREES”. Full disclosure, the metal letters actually had little magnets glued to the backside. I didn’t feel like spending time looking for letters without magnets, so I just used needle nose pliers to pull the magnets off. Most came off pretty easily, a few took a little extra strength. Also, the galvanized letters come in silver, gold and rust but the letters I needed were almost all rusted, which is not the look I was going for, so I just sprayed them each with a light coat of this Rust-Oleum hammered silver spray paint for a full galvanized look.

To create the trees, I used acrylic craft paint in a dark green and dark brown. This part might be intimidating, but honestly, it is easier than you think. Start with the large tree. Use brown, with a small (1/4″) paint brush and paint a straight line for the trunk, making it a little wider at the bottom. Once the trunk is dry, use the same brush (cleaned and dried) and begin to paint on the branches. I painted 1 long stroke to the side for each branch, then light little strokes jetting out along the top and the bottom of each branch. Start with sparse branches (I started with 7 on each side of the large tree), fill in the shoots on each branch and then go back and add more little branches to make the tree look full. On each branch, allow your brush to get a little dry without reloading it with paint in order to get a whispy look here and there.

That’s it! What do you think? Worth it to not make the drive? Haha!
If you want to hang your new sign, just add one of these saw tooth picture hangers to the back side, centered, about an inch from the top. Just make sure your nails are not too long and won’t go through your wood board, no more than 3/4″.