
So it’s been almost a month and a half since my last blog post and I have felt like a part of my heart was missing! It has been an absolutely crazy past 6 weeks with work. And when I say work, I’m not talking about fun blog stuff in the works. I mean, my real-life, money making job. As much as I wish the blog could pay my bills, that is just not the case. Don’t get me wrong, I do love my job, but blogging and DIY has really become a huge passion and I have felt a little lost without it.
The hiatus is over and I am so thrilled to be back at it. I also realized today that my blogiversary is coming up very soon, it’s already been 1 year since I started this crazy journey! (Did I just use the word journey? What am I, a Bachelorette contestant?!?!). On one hand it feels like I just started yesterday, and on the other, I feel like I’ve been doing this forever. Either way, it was one of the best decisions I’ve ever made.
On to the post…
We have a queen bed in our guest bedroom, that, for the longest time, has just been sitting on a boring metal frame. I forgot to take before photos of this room when we bought the house so I snapped a quick photo before I started painting.

I bought this queen bed over a year ago. I was furniture shopping at thrift stores and came across it. I certainly didn’t need a queen size headboard/footboard/frame but I loved the look of it, it was super sturdy and very well built and was only $150, so I brought it home. And there it sat, in my garage, for all this time. My husband is a big fan of that, by the way, all the stuff I buy because I think I will use it someday that just sits in our garage or extra bedroom. Oops.

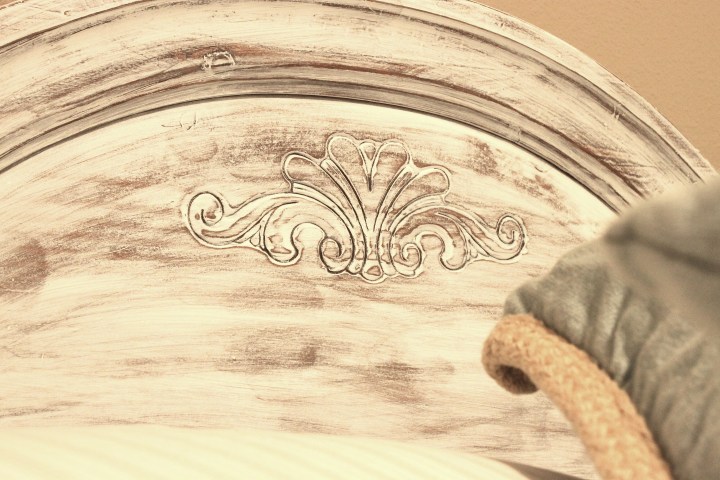
I did a quick and easy update on this piece, just 1 coat of white chalk paint and then sanded it down to let some of the dark wood show through and get a worn look. When you paint a light color over dark wood, people think it takes a lot of coats. If you are going for a worn, antique look, 1 coat should be enough. After just one coat, here is what the wood looked like…

Don’t worry if the paint looks streaky or doesn’t completely cover the wood. When I sanded, I used a fine grit (220) sand paper and ran it all over the wood. As you come to a spot where the brush strokes really stand out, this is where a put a little more pressure on the sand paper and make that a “worn” spot. Ultimately, the key is to not worry too much as you sand. You can always go back and sand more or add another layer of paint in some spots if you need to but you don’t want it to look perfect.


The bedding used in this room is from Pottery Barn, part of our wedding registry, so it isn’t available any longer but their Jessie Organic Duvet & Sham are a similar color palette and pattern.
Now that I have the bed done and in place, I can’t wait to finish painting and decorate the rest of the room. Stay tuned!
I’m ready to come sleep in that cozy bed!
wow, this bed is beautiful. I love it. I want to buy it.
Thank you! If you are interested in buying the bed, feel free to contact me through email, jmblckwd@comcast.net