
I’m sitting here trying to write this blog post but I’m so distracted because I CAN’T STOP watching footage from the royal wedding!!! Anyone with me?!?! Meghan Markle is just gorgeous and living a real life fairytale. *Sigh* The dress, the vows, the choir, all the heart eyes for everything!
By the way, back from Hawaii! It was SUCH a great trip 🙂 So relaxing and fun. It had been almost 3 years since Jeff and I had gone on a trip together and it was so nice to spend time together, sleep in, eat tons of food, lay in the sun and explore Maui. I will probable do a post about it, what we did, where we ate, what I wore. Is that something you guys would be interested in? If so, leave me a comment on this post.
When I did the post on Faux Greenery & Florals I actually got quite a few questions about where I got those books on the mantle. Well, I made them! I love the look of vintage books used in home décor and wanted to play around with the look as well so I started looking for some books. I went to a local thrift store but didn’t find anything that was the look I was going for. Then I came across this picture on Pinterest…

I LOVE the look of these but 1) they are from Restoration Hardware, so I can only imagine how much it would’ve cost for just 3 “books” (I write that in quotations because I’m pretty sure they are just boxes made to look like books) and 2) they aren’t actually available for purchase anymore. So, what did I do? Yep…I made them! You are getting to know me so well 🙂 I had all the supplies on hand except the Mod Podge and the grey fabric for the binding.
Supplies
old paperback books
Mod Podge matte
brown kraft paper
sponge applicator
grey cotton fabric
black, fine tip marker
twine
pencil
scissors

Step 1:
Choose paperback books that you don’t have a use for anymore. I had a whole pile of books in boxes that would probably be taken to a thrift store at some point had I not used them for this project.

Step 2:
In this step, I completed each part on all books, sort of an assembly line style instead of doing 1 book at a time.
Use a pencil or marker to outline the front and back cover of each book on the kraft paper. You do not need to cover the binding, that will be covered with the fabric. You’ll also want to keep the papers with their books once you cut them out as the books may all be different sizes. Use scissors to cut out each piece of kraft paper. Next, use the sponge applicator to coat one side of paper with Mod Podge, attach it to the book then coat the top of the paper with another layer of Mod Podge. Allow top cover to dry for at least 15 minutes. Complete same process on back cover.
Once dry, check the edges of each cover to make sure the paper is secure. If necessary, add a bit more Mod Podge to secure it.

Step 3:
For each book, you will cut a piece of gray fabric to cover the binding. Before I began I made a raw edge on the top and far left side of the piece of fabric. I did this by making a small cut with a pair of scissors about 1/4″ in from the edge and the using my hands to tear the fabric. Determine what size your piece of fabric needs to be for the binding and cut it using the same method, small slit and then tearing. To attach the fabric, coat the area that will be under the fabric with Mod Podge. (Its ok if you’re a little messy with it as it will dry clear). Apply the fabric to the book binding, then spread another coat of Mod Podge to the top of the fabric. Stand the books up in a V shape on the page end so the fabric is not touching anything and allow it to dry at least 15 minutes.

Step 4:
This step is not completely necessary but I think it adds a nice touch. I used some of the kraft paper, wrote down the titles of some great novels, cut them into strips and attached them to the book bindings with Mod Podge.

Step 5:
Again, this step is not completely necessary if you don’t want the books held together in bundles. I only put the twine around the books that are standing up, but it is easy enough to add the twine or take it off if you want.
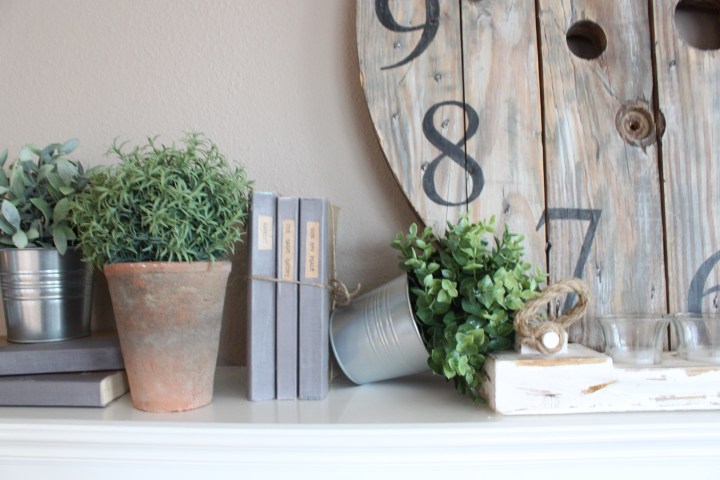
Place books throughout your home for some vintage charm 😉
Hi Jamie-would love to see a Maui trip post! Where did you guys stay?! We love Maui.
Yay! I think I will do one eventually. We stayed at the Westin Kaanapali