
I’ve wanted to have a vegetable garden for quite some time now. Lack of time is what stopped me before. Now that I have some (little) time on my hands, I thought this might be a good time to give it a shot. I waited a bit it to long though to work out all the plans for a full vegetable garden (building beds, planning what to plant and when, etc.) plus, I’m terrible at keeping plants alive (they need water, I’m not so good at remembering to give it to them) so, I thought an herb garden would be a safe place to start. So far so good, granted, it’s only been about a week, but we’re off to a good start.
I have a feeling the fact that I’m getting something out of keeping these plants alive, i.e. herbs for my cooking, is going to help me stay on track because so far I’m super excited about this little gem on my back deck. I’ve already used some of the herbs a couple of times and there is something very satisfying about walking out the back door and snipping off a few sprigs or leaves of whatever I need. Not to mention, so much less waste! I can’t tell you how often I buy a full bunch of parsley or cilantro and only need a couple tablespoons. The rest always ends up going to waste. Now I can just take what I need.
When I started making plans for the herb garden, I was on Pinterest looking for different planter ideas. There are tons of great ideas, for both indoor and outdoor, however many of them required building the planters. Not that I’m against building something…obviously…but the thought of building a planter then having to plant all the plants somehow seemed like a bit too much, especially for something that may or may not be dead by the end of summer. I wanted to keep this as simple as possible in case the inevitable happens. So, I started looking for planters that held multiple pots and remembered I had seen this one a few weeks prior.

This is the Socker Plant Stand from Ikea, it holds 13 4″ pots and stands just over 5′ tall. The stand can pivot to be positioned at an angle or opened up completely and be straight from end to end. It comes in white or grey (which to me looks more like black in person). Unfortunately, this piece is not available online (sorry guys!) but can be picked up in store if you have an Ikea nearby. I chose these galvanized pots to complete the simple look I was going for.
The first thing I learned about container gardening while doing my research, is that your containers need to have good drainage. The galvanized pots I chose did not have any drainage holes, of course. Now, you could get around this by putting rocks in the bottom of the pot but these are small pots and I knew it would be pretty easy to just drill some holes in bottom. I used a 5/8″ drill bit and drilled 4 holes in each pot. You want the holes to be big enough that bark or larger chunks in the potting soil aren’t going to plug up the holes but small enough that soil isn’t going to easily flow out when watered I made sure to pot one plant and water to see that it worked well before drilling holes into the other 12 pots.

The herb plants that I picked up were from Home Depot and they really make it super easy to plant. They are grown by Bonnie Plants, in biodegradable “pots” that can literally just be dropped into your container. Simply cut off the plastic liner around the top of the pot…

The second thing I learned when researching container gardens is that you want to use a Potting Mix and NOT a Potting Soil. The reason being that potting mix is lighter weight, has fertilizer mixed in, promotes better drainage and absorbs moisture in the best way. Fill the bottom of your container with about an inch of soil…
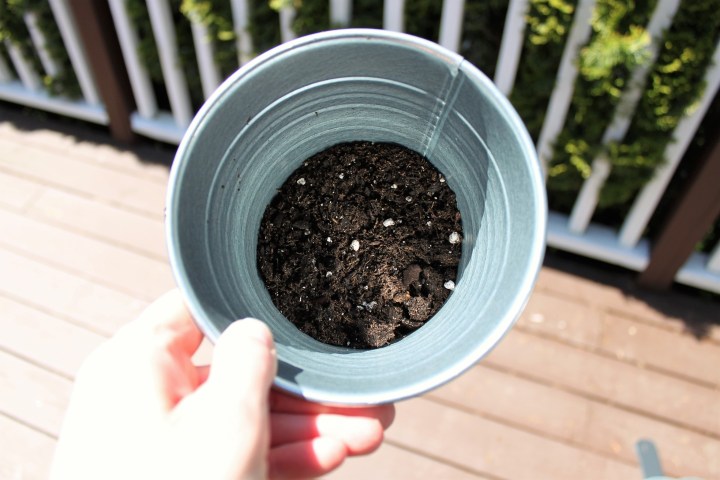
Peel the bottom of the biodegradable pot off the plant to allow the roots out. Place the plant in your container and fill remaining space with soil.

I used a mixture of different herbs, just based on what I use more when cooking. Here is my assortment:
3 Cilantro
2 Parsley
2 Mint
2 Thyme
1 Sage
1 Rosemary
1 Oregano
1 Basil
I cook a lot with Cilantro so I wanted a few of those. Looking at it now, I should have done an additional Parsley because I’ve already used those plants a lot, but I only had 13 spots. I’ll have to see what happens throughout the season and adjust for next year. But, if this goes well, maybe my herb garden will be MUCH bigger next year 🙂

To finish off, I made little “signs” for each pot to label which herb it held. I used new popsicle sticks (which you can get at a craft store year round or most grocery stores during summer months), dipped about 3/4 in black chalkboard paint, laid them on wax paper to dry and then used a white paint marker to write the name of the herb.

I’m seriously so excited about this little addition to my yard. I’m already saving money at the grocery store and wasting less! I’ll keep you all updated on whether or not I can develop some green thumbs 🙂

3 thoughts on “DIY Herb Garden”